Sending your API errors asynchronously as slack notifications
Sending errors asynchronously from your express API as slack notifications using the slack API and BullMQ queues


Sending errors from your express API as slack notifications can be a useful way to stay informed of any issues with your application in real-time. By utilizing the slack API and BullMQ queues, you can set up a system that automatically sends notifications to a designated slack channel whenever an error occurs within your API.
In this article, we will discuss how to send errors from your Express API as Slack notifications using the Slack API and BullMQ queues.
Step 1: Creating the slack app
Firstly we will start by creating a slack app for our slack workspace and setting up a new incoming webhook. This will provide us with a unique URL that we can use to send messages to a specific channel. Once we have this URL, we can send a test message to our Slack channel.
To create a slack app:
Go to https://api.slack.com/apps, select create a new app, name your app and choose a workspace to develop your app.
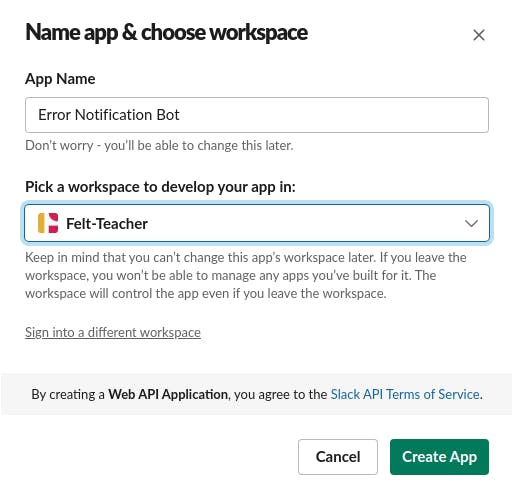
Here I have named my app "Error Notification Bot" and Selected the "Felt-Teacher" workspace to develop my app in.
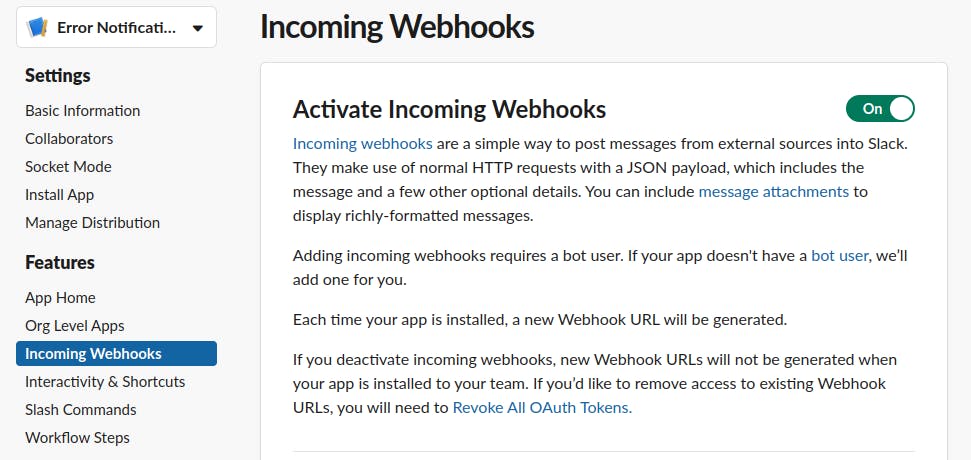
From the app dashboard, activate incoming webhooks for your app
Install the app to your workspace and select the channel you want to receive your messages

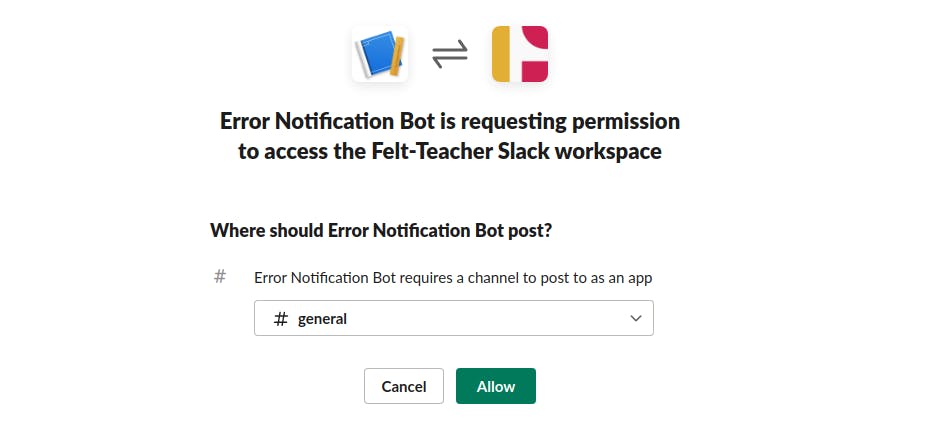
Here I have chosen the "#general" channel as the channel to receive messages.
Once the app is installed, copy and store the webhook URL for the channel you chose to receive your messages. the webhook URL will be used later to post messages.

Step 2: Setting up a basic express API
Next, we'll set up a basic express API and create an endpoint that'll always throw an error if its request method is "GET"
First, install the dependencies, we'll be using express and the bullmq packages
 npm init -y
 npm install express bullmq
Next, create the express app and add a route that returns an error if the request method is "GET".
In your index.js add,
 //index.js
 /**Import express */
 const express = require("express")

 /**Instantiate the application */
 const app = express()

 /**Set the port for the app to run on */
 const PORT = 3000;

 /** Create a route that'll throw an error when the request method is GET */
 app.get("/", async (req, res, next) => {
     try {
         if(req.method === "GET") {
             throw new Error("An error Occured")
         }
         res.sendStatus(200)
     } catch(error) {
         next(error)
     }
 })

 /**Start the app */
 app.listen(PORT, () => {
     console.log(`App listening on PORT ${PORT}`)
 })
Step 3: Integrating BullMQ
Next, we will integrate BullMQ into our express app. BullMQ is a powerful message queue library that allows us to easily add background processing to our application. In this case, we will use it to create a queue for error messages that will be sent to slack.
Create a new bullmq queue, and add an error handler to the application that'll catch all errors and add them to the queue.
in your index.js add,
 //index.js
 /**Import express */
 const express = require("express")

 /**Instantiate the application */
 const app = express()

 /**import Queue from bullmq */
 const { Queue } = require("bullmq")

 /**Set the port for the app to run on */
 const PORT = 3000;

 /** create the queue with the redis connection */
 const slackQueue = new Queue("slack_queue", {
     connection: {
         host: "localhost",
         port: 6379
     }
 })

 /** A Function for adding jobs to the slack queue */
 const addToSlackQueue = async (job) => {
     await slackQueue.add(job.name, job)
 }

 /** Create a route that'll throw an error when the request method is GET */
 app.get("/", async (req, res, next) => {
     try {
         if(req.method === "GET") {
             throw new Error("An error Occured")
         }
         res.sendStatus(200)
     } catch(error) {
         next(error)
     }
 })

 /** Error Handler to catch all errors in your application and add them to the slack queue */
 app.use(async (err, req, res, next) => {
     await addToSlackQueue({ name: "error", message: err.message })
     res.sendStatus(500)
 })

 /**Start the app */
 app.listen(PORT, () => {
     console.log(`App listening on PORT ${PORT}`)
 })
Create a new file worker.js here you'll create a handler function that posts a message to your slack webhook URL, and create a bullmq worker that processes the jobs in the queue.
in your worker.js add,
 //worker.js
 /**Import Worker from bullmq */
 const { Worker } = require("bullmq")

 /**import axios */
 const axios = require("axios")

 /** Your slack app incoming webhook url */
 const WEBHOOK_URL = "https://hooks.slack.com/services/..."

 /**a handler function fro the slack queue, it takes in the job and posts a message to slack */
 const sendMessageToSlack = async(job) => {
     const { message } = job.data
     await axios.post(WEBHOOK_URL, { text: message })
 }

 /**Create a new worker, with the redis connection that processes the jobs in the slack queue */
 const worker = new Worker("slack_queue", sendMessageToSlack, {
     connection: {
         host: "localhost",
         port: 6379
     }
 })

 /**log to the console when a job has been completed by the worker */
 worker.on('completed', job => {
     console.log(`${job.name} has completed!`);
 });
Step 4: Running the app and queue worker
Finally, we'll start the express app and queue worker
To start the app run
node index.js
You should see your application running

To start the worker, run
node worker.js
Make sure to start the queue worker in your application, so that it can process the errors and send them to Slack.
Step 5: Testing the notifications
Now that we have both our express app and queue worker running, let's test our notifications and make a get request to the route we created
We'll use curl to make a get request to our route.
in your terminal run
curl localhost:3000
Our worker process should log that the error job has been completed

And we should get a notification on slack from our app in the channel we specified earlier

Summary
In conclusion, sending errors from your Express API as Slack notifications is a great way to identify and resolve issues quickly. By using the Slack API and BullMQ queues, you can receive real-time notifications of any errors that occur within your API, allowing you to take action immediately.
With this setup in place, any errors that occur within your API will be automatically sent to your Slack channel, allowing you to stay informed and quickly address any issues that arise. This can be a useful tool for monitoring the health of your application and ensuring that it is running smoothly.